National Book Lovers Day is celebrated on August 9 and of course being the book nerd that I am, I gathered up some old books to craft with Alex Worstell on Good Day Acadiana last year. I actually made one of these years ago at a local library and loved it!
The best part is you can make this craft at home using items around the house any time of the year. Here's a step-by-step guide on how to turn an old hardback book into a stylish tote or purse.
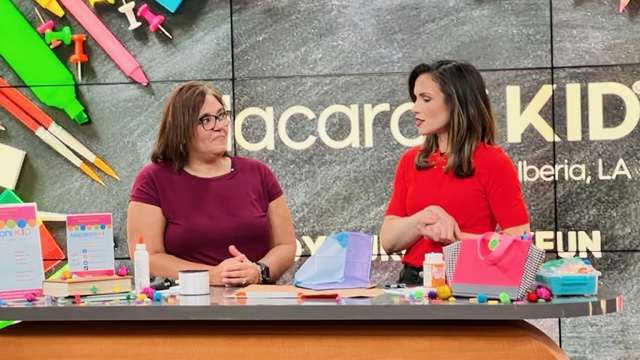 Creating the Book Purse Craft with Alex on the News 15 Morning Show August 9, 2023Image by Mia Barletto |
Supplies You'll Need:
- Old Hardback Book: Choose a book with a cover that matches your style! You can also grab one from the free book stacks at the Iberia Parish Library branches.
- Craft Knife: For removing the pages from the inside of the book. Also, make sure to grab a thick piece of cardboard or other sturdy, flat item to lay your book on while you cut.
- Ruler: To measure and mark the cutting lines.
- Mod Podge or Glue: To seal the edges of the material inside the book cover. We used a mix of hot glue and Mod Podge.
- Paintbrush: For applying glue and Mod Podge to your material and decorations.
- Fabric Scraps and ribbon: For creating the purse handle and inside of your bag.
- Other Crafting Items: You can use buttons, stickers, small noodles or beans, or whatever other items you have.
August 9, 2023 Image by Tracie Ysaguire |
August 9, 2023 Image by Tracie Ysaguire |


Step-by-Step Instructions:
Choose Your Book: Decide how big you want your purse to be. Pick a hardback book that you no longer need. Make sure the cover and spine are in good condition and reflect your style.
Cutting Pages: Next, you will remove the entire binding of the inner pages from the book by cutting along the seams. It's best to use a craft knife, like an X-acto knife to remove them. Be careful not to cut through the seams of the book cover. I recommend using a sturdy piece of cardboard as well to lay your book and fabric on while you cut.
Measure Your Fabric: You can grab scrap fabric from the craft store or use and old pillow case. The fabric will line the inside of the book, creating the inside of the purse to hold your small items. It's best to lay your hardcover book on a flat surface and then drape your material over the book. Use your ruler to measure and mark where you need to cut. Make sure your fabric is a just a bit bigger than the inside of your book. You can also trim it down later.
Seal Inside of Book with Fabric: Apply a layer of Mod Podge or glue to the inside flaps of your book. You will place the larger piece of fabric here, trimming if you need to. To prevent the edges from fraying, fold them down into to inside cover of your book, and use Mod Podge or glue to hold them in place. Depending on the type of glue you use, it will take some time for the glue to completely dry. While that is drying, you can work on your side pieces.
Create the Side Flaps: Once you have the fabric cut and measured for the inside of your book purse, you will want to create the side piece that keeps your items inside the purse. Take you book and turn it on it's side creating a triangle. Place your fabric under the triangular side of the book to measure and trim the size you need. Again, you will want this piece to be a little bit bigger and trim down as you need to. For more insight on this part, watch this video form the Midland Public Library as they create something similar.
Add Triangular Pieces In Place: Once the fabric inside your book is completely dry, now you can add the triangular shapes to the side. You will wan to fold in the edges of fabric, just as you did for the inside cover and glue them into the book. I used hot glue for this step to get them to hold in place better. Once that was dry, I went over the seams with Mod Podge as well. Let that dry before adding decorative items.
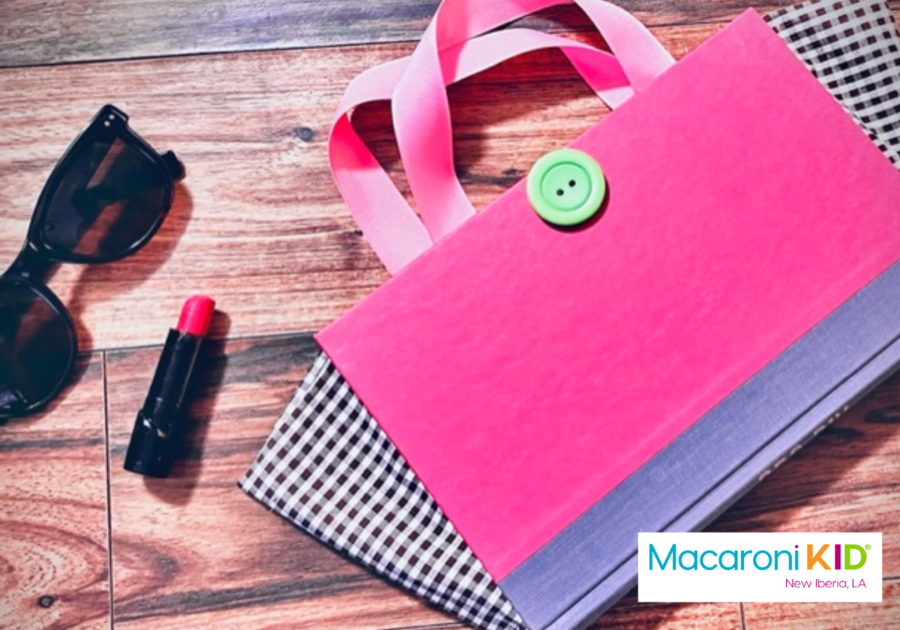
Decorate the Outside: While your book is drying, gather up the decorative items you would like to add to give your book purse some personal pizzazz! You can use anything from paper, pom-poms, glitter, or stickers. Once your entire inside of fabric for your book is dry, begin to decorate the cover of you purse.
Create Handle: Use ribbon or fabric strips, or even and old belt to make a handle for your purse. Attach the ends securely to the inside covers of the book with hot glue.
Now, give your purse a final once-over. Trim any excess paper or glue, and make sure everything is securely in place.
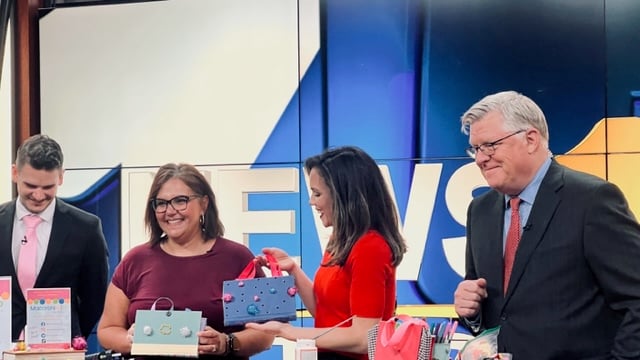 Crafting morning fun with the team from the KADN Morning Show August 9, 2023Image by Mia Barletto |
We were able to create our Book Purse craft on the show live with Alex in the span of two hours. This craft is more intricate than some we have done in the past, but it gives you a great way to get your kids thinking creatively with a book and offers a chance for quality time with them.
We always have so much fun with these guys! Join us next time on Good Day Acadiana with Alex Worstell on Wednesday, August 7, 2024 from 7:00 am to 9:00 am.
You can also watch the live stream of the Good Day Acadiana every weekday online. Or, catch up on all of our past crafting segments on their You Tube Channel.
Happy Crafting Acadiana! |